Have you ever noticed how your breathing changes when you feel stressed, anxious, or overwhelmed? Perhaps your breath becomes shorter when you are rushing to finish a task, or you find yourself breathing more slowly when you finally sit down and relax.
Breathing is something we do every moment without thinking about it. Yet, when we begin paying attention to our breath, we discover a simple way to become more aware of our body and mind.
This is one of the ideas behind pranayama, an important practice in India’s traditional yoga system.
Pranayama teaches us to observe and regulate our breathing with awareness. Rather than treating breathing as an automatic bodily function, it encourages us to approach each inhalation and exhalation with patience, steadiness, and attention.
The good news is that you do not need years of yoga experience to begin. A quiet place, a comfortable sitting position, and a few minutes of your day are enough to explore some basic breathing practices.
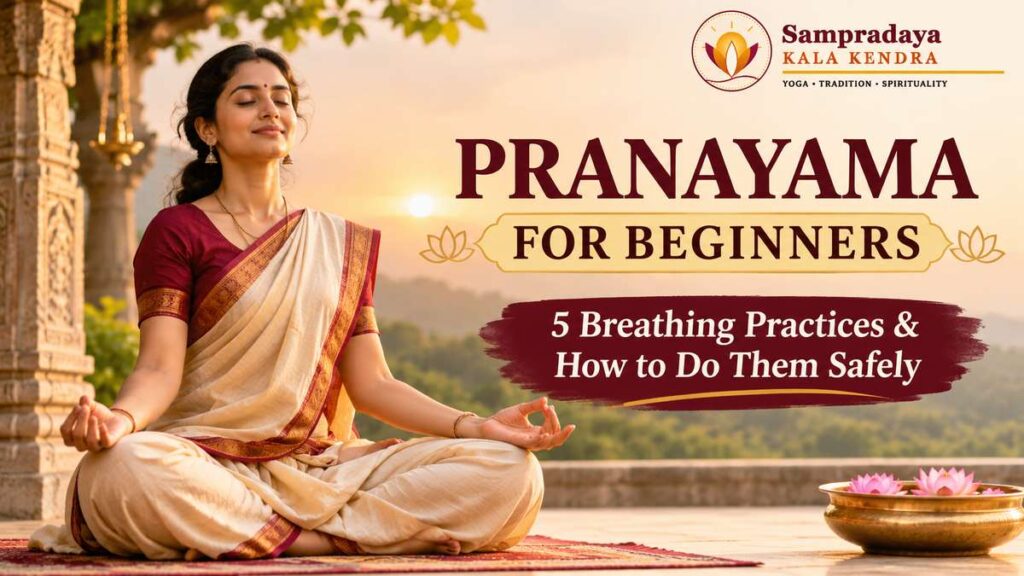
In this guide, we will look at five pranayama techniques suitable for beginners, learn how to practise them step by step, and understand the precautions that can help make your practice more comfortable.
Whether you are discovering yoga for the first time or looking to develop a simple daily routine, these techniques offer a practical starting point.
What Is Pranayama?
Pranayama is a Sanskrit term commonly associated with the regulation or expansion of prana, often understood in yogic traditions as vital energy or life force.
In traditional yoga, pranayama refers to practices that involve consciously observing and regulating the breath. It is often practised alongside yoga postures, meditation, and other disciplines that encourage awareness and self-control.
However, pranayama is not simply about taking deep breaths. Different techniques have different purposes and methods. Some encourage awareness of natural breathing, others introduce a steady rhythm, and some use alternate nostril breathing or gentle humming.
For beginners, the most important thing is to learn without rushing.
You do not need to control every breath perfectly or perform complicated techniques on your first day. Start by noticing how you breathe naturally. As you become more comfortable, you can gradually explore simple practices that suit your needs.
Why Should Beginners Practise Pranayama?
Modern life can be demanding. Work, family responsibilities, travel, screen time, and everyday concerns often leave us with very little opportunity to pause.
Setting aside a few minutes for conscious breathing can create a welcome break in an otherwise busy day.
A comfortable breathing practice may help you relax, focus your attention, and become more aware of physical tension. Some people also find that slow, mindful breathing helps them approach stressful situations with greater calm.
Here are a few reasons to consider incorporating pranayama into your routine.
1. It May Help You Manage Everyday Stress
When you are under pressure, you may notice that your breathing becomes faster or shallower.
Taking a short break to observe your breath can give you an opportunity to slow down and reconnect with the present moment. Gentle breathing exercises may support relaxation, although individual experiences vary.
2. It Encourages Better Awareness of Your Body
Many of us go through the day without noticing how we breathe, whether our shoulders are tense, or whether we are holding our breath while concentrating.
Pranayama encourages you to notice these patterns without judging yourself.
With regular practice, you may become more aware of the connection between your breathing, posture, and physical comfort.
3. It Provides a Focus for Meditation
If you have tried meditation, you may know how easily the mind wanders.
Following your inhalation and exhalation gives your attention something simple to return to whenever distracting thoughts arise.
For this reason, breathing awareness is often used as a preparation for meditation.
4. It Can Become a Useful Daily Habit
You do not need to dedicate an entire hour to establish a breathing routine.
A few minutes in the morning, during a break, or before bedtime may be enough to help you build consistency.
The key is to choose a time that fits naturally into your day.
5. It Encourages a More Mindful Approach to Daily Life
Pranayama invites you to slow down and pay attention to something that is always present: your breath.
This simple act of awareness can encourage a more deliberate approach to everyday activities.
A note about health: Pranayama is a complementary wellness practice, not a replacement for medical care. It should not be treated as a guaranteed cure for anxiety, high blood pressure, asthma, or other medical conditions.
Five Pranayama Breathing Practices for Beginners
There are several pranayama techniques in traditional yoga. If you are just starting, it is sensible to begin with gentle methods that do not require forceful breathing or prolonged breath-holding.
The following five practices introduce different ways to work with your breath.
1. Dirgha Pranayama: Three-Part Breathing
Best for: Beginners who want to develop breathing awareness and become comfortable with mindful breathing.
Dirgha Pranayama is commonly known as three-part breathing. The practice involves paying attention to the movement of the abdomen, rib cage, and upper chest as you breathe.
Many people breathe without noticing how different parts of the torso move. This exercise encourages you to observe those movements rather than trying to change your breathing dramatically.
The aim is not to take the biggest breath possible. It is to breathe comfortably while becoming more aware of your body.
How to Practise Three-Part Breathing
Step 1: Find a comfortable position
Sit on a chair with your feet resting on the floor, or sit comfortably on a yoga mat. Keep your back naturally upright without stiffening your shoulders.
Step 2: Relax your body
Rest your hands on your abdomen. If you prefer, place one hand on your chest and the other on your belly.
You can close your eyes if that feels comfortable.
Step 3: Observe your natural breath
Take a few ordinary breaths through your nose. Notice the movement of your abdomen and chest without deliberately changing anything.
Step 4: Bring awareness to three areas
As you inhale gently, notice your abdomen moving, your lower ribs expanding, and your upper chest moving slightly.
Allow these movements to happen naturally. There is no need to exaggerate them.
Step 5: Exhale without forcing the air out
Let your breath leave comfortably. Notice your abdomen and chest returning towards their resting positions.
Step 6: Repeat at a comfortable pace
Continue for five to eight breaths. If you feel comfortable, you can gradually extend the practice.
What Are the Benefits of Three-Part Breathing?
This technique can help you:
- Become more aware of your natural breathing patterns.
- Practise relaxed, mindful breathing.
- Recognise unnecessary tension in your chest and shoulders.
- Develop a simple foundation for other breathing exercises.
Safety tip: Avoid trying to fill your lungs completely with every inhalation. If you feel dizzy, uncomfortable, or unusually short of breath, stop and return to normal breathing.
2. Anulom Vilom: Alternate Nostril Breathing
Best for: Beginners who enjoy structured breathing exercises and want to practise focused attention.
Anulom Vilom is a traditional yogic breathing technique in which you alternate between the left and right nostrils while inhaling and exhaling.
Because the practice follows a particular sequence, it gives your attention something specific to focus on. Many people include it in their regular yoga or meditation routine.
You may also come across the term Nadi Shodhana. The two names are sometimes used interchangeably, although certain yoga traditions distinguish between variations of these techniques.
For beginners, a gentle version without breath retention is a practical place to start.
How to Practise Anulom Vilom
Step 1: Sit comfortably
Choose a chair or yoga mat and sit upright. Relax your shoulders, jaw, and facial muscles.
Step 2: Position your right hand
Bring your right hand towards your nose.
In a commonly taught hand position, the thumb closes the right nostril, while the ring finger closes the left nostril. Keep your hand relaxed.
Step 3: Begin with a comfortable exhalation
Breathe out gently through both nostrils.
Step 4: Inhale through the left nostril
Close your right nostril with your thumb and breathe in gently through the left nostril.
Step 5: Exhale through the right nostril
Close your left nostril with your ring finger. Release your thumb and breathe out through the right nostril.
Step 6: Inhale through the right nostril
Keep your left nostril closed and breathe in comfortably through the right nostril.
Step 7: Exhale through the left nostril
Close your right nostril, release your left nostril, and breathe out gently.
You have now completed one round.
Step 8: Repeat slowly
Begin with three to five rounds. Keep your breathing smooth and avoid rushing through the sequence.
What Are the Benefits of Alternate Nostril Breathing?
Anulom Vilom may help you:
- Develop concentration and breathing awareness.
- Create a structured pause during a busy day.
- Prepare for meditation.
- Incorporate mindful breathing into your yoga routine.
Safety tips:
- Never force air through a blocked nostril.
- Do not hold your breath while learning the technique.
- Keep your breathing quiet and comfortable.
- Stop if you experience dizziness, discomfort, or breathlessness.
If you have a chronic respiratory condition or another significant health concern, consult a healthcare professional before beginning a new breathing routine.
3. Bhramari Pranayama: Humming Bee Breath
Best for: Beginners who enjoy sound-based practices and want to explore a gentle breathing exercise.
Have you ever noticed how a soft humming sound can draw your attention away from surrounding distractions?
Bhramari Pranayama uses this simple idea. Often called humming bee breath, the technique involves breathing in gently and producing a soft humming sound while breathing out.
Instead of focusing only on the movement of air, you pay attention to the sound and the subtle vibration created by humming.
For people who find silent meditation difficult, this can provide an accessible way to practise focused awareness.
How to Practise Bhramari Pranayama
Step 1: Find a quiet place
Sit comfortably with your back upright. Relax your shoulders and facial muscles.
Step 2: Inhale gently
Breathe in through your nose at a natural, comfortable pace.
There is no need to take an unusually deep breath.
Step 3: Hum as you exhale
Keep your lips gently closed and make a soft humming sound as you breathe out.
Allow the sound to continue naturally throughout your exhalation. Do not push the air out simply to make the sound last longer.
Step 4: Pay attention to the sound
Notice the gentle vibration around your face and the sound of your own humming.
If your mind wanders, bring your attention back to the sound without becoming frustrated.
Step 5: Repeat a few times
Practise three to five rounds, returning to normal breathing between rounds whenever needed.
What Are the Benefits of Bhramari Pranayama?
This practice may help you:
- Focus your attention on a simple, repetitive sound.
- Develop awareness of your breathing.
- Create a calming pause during a stressful day.
- Prepare for meditation or quiet reflection.
Safety tip: Keep the humming gentle. Do not strain your throat or forcefully extend the exhalation. Stop if you experience ear pain, pressure, dizziness, or breathing discomfort.
If you have an ear, sinus, or respiratory condition, seek appropriate professional advice before practising this technique.
4. Ujjayi Pranayama: Victorious Breath
Best for: Beginners who are comfortable with basic breathing awareness and want to explore a more controlled breathing pattern.
Ujjayi Pranayama is traditionally associated with a soft, slightly audible sound produced by gently narrowing the passage at the back of the throat.
It is sometimes called ocean breath because the sound may resemble gentle waves.
Ujjayi is used in several yoga traditions, including practices where breathing is coordinated with physical postures.
For beginners, the goal is not to create a loud or dramatic sound. The emphasis should remain on breathing smoothly and comfortably.
How to Practise Ujjayi Pranayama
Step 1: Sit in a comfortable position
Sit upright on a chair or mat. Relax your shoulders, neck, and jaw.
Step 2: Observe your natural breathing
Take several ordinary breaths through your nose. Notice how the air moves in and out.
Step 3: Explore a gentle throat sensation
Imagine softly fogging a mirror with your breath. Notice the subtle sensation at the back of your throat.
You can explore a very gentle version of this sensation while keeping your mouth closed.
Do not squeeze your throat or deliberately restrict your airflow.
Step 4: Inhale through your nose
Breathe in gently. If you can do so comfortably, allow a faint, smooth sound to develop.
Step 5: Exhale through your nose
Breathe out with the same gentle quality. The sound should remain soft rather than harsh or forced.
Step 6: Practise for a few breaths
Start with three to five comfortable breaths, then return to your natural breathing pattern.
You can explore the technique further with a qualified yoga teacher if you find it difficult to perform comfortably.
What Are the Benefits of Ujjayi Pranayama?
Ujjayi may help you:
- Pay closer attention to your breathing.
- Develop a steady breathing rhythm during yoga.
- Practise concentration and mindful awareness.
- Coordinate breathing with movement in suitable yoga practices.
Safety tip: Ujjayi should never feel as though you are struggling to breathe. If your throat becomes dry, tight, or uncomfortable, stop the exercise.
If you have asthma or another breathing condition, seek individual guidance before practising techniques that alter your usual breathing pattern.
5. Sama Vritti Pranayama: Equal Breathing
Best for: Beginners who prefer a simple breathing exercise with an easy-to-follow rhythm.
Sama Vritti Pranayama is commonly described as equal breathing. The basic idea is to make your inhalation and exhalation approximately equal in duration.
Unlike alternate nostril breathing, this practice does not require you to change nostrils or produce a particular sound.
You simply breathe in and out while following a comfortable rhythm.
For beginners, this can be a straightforward way to explore controlled breathing without introducing a complicated sequence.
How to Practise Equal Breathing
Step 1: Sit comfortably
Sit on a chair or cushion with your back naturally upright. Allow your shoulders to relax.
Step 2: Observe your breathing
Take a few ordinary breaths and allow yourself to settle.
Step 3: Inhale gently
Breathe in through your nose for a comfortable count of three, provided that this feels natural.
You do not have to reach three if the count makes you feel short of breath.
Step 4: Exhale for a similar count
Breathe out gently for approximately the same duration.
Avoid pushing the air out or trying to control every movement of your chest.
Step 5: Continue with a steady rhythm
Repeat the inhalation and exhalation while maintaining a comfortable pace.
There is no need to pause between breaths or hold your breath.
Step 6: Practise for one or two minutes
Begin with a short session. If you remain comfortable, gradually increase the duration.
What Are the Benefits of Equal Breathing?
Sama Vritti may help you:
- Establish a steady breathing rhythm.
- Bring your attention back to the present moment.
- Develop a simple mindfulness habit.
- Create a relaxing pause between daily activities.
Safety tip: The counting is only a guide. If you feel that you must struggle to complete a count, abandon the count and return to your natural breathing pattern.
Comfort matters more than maintaining a particular rhythm.
Comparing the Five Pranayama Techniques
Not sure which technique to try first? This comparison can help you choose a starting point.
| Pranayama technique | Main focus | Suggested starting practice | Beginner suitability |
|---|---|---|---|
| Dirgha Pranayama | Awareness of abdominal and chest movement | Five to eight comfortable breaths | Easy |
| Anulom Vilom | Alternating nostril breathing | Three to five rounds | Easy to moderate |
| Bhramari Pranayama | Gentle humming during exhalation | Three to five rounds | Easy |
| Ujjayi Pranayama | Soft, controlled breathing | Three to five breaths | Easy to moderate |
| Sama Vritti Pranayama | Equal inhalation and exhalation | One to two minutes | Easy |
These are suggested starting points rather than fixed requirements. Your comfort, health, and experience should determine how long you practise.
You also do not need to perform all five techniques in one session. Choose one or two that feel natural and give yourself time to become familiar with them.
How to Start a Daily Pranayama Routine
One common mistake beginners make is trying to do too much too soon.
After learning about several techniques, it can be tempting to practise all of them for 20 or 30 minutes on the first day. However, a shorter session may be easier to maintain while you develop confidence and learn how your body responds.
Here is an example of a gentle 10-minute routine.
A Beginner-Friendly 10-Minute Routine
Minutes 1–2: Settle into your posture
Sit comfortably and relax your shoulders. Observe your natural breathing without trying to change it.
Minutes 3–4: Practise Dirgha Pranayama
Bring your attention to the movement of your abdomen, lower ribs, and upper chest as you breathe gently.
Minutes 5–6: Practise Sama Vritti
Allow your inhalation and exhalation to follow a similar, comfortable rhythm. Stop counting if it creates tension.
Minutes 7–8: Practise Anulom Vilom
Complete a few rounds of alternate nostril breathing without holding your breath.
Minute 9: Try Bhramari
If comfortable, practise two or three gentle humming exhalations.
Minute 10: Sit quietly
Return to natural breathing. Notice how you feel before ending the session.
This routine is an example, not a requirement. If you are completely new to pranayama, start with just one technique for three to five minutes.
You can add other practices later if you wish.
Remember: consistency and comfort are more important than completing every exercise.
When Is the Best Time to Practise Pranayama?
There is no single time that works best for everyone. The right time is one that allows you to practise comfortably without rushing.
Many people prefer morning practice, while others find an evening session easier to fit into their schedule.
Practising in the Morning
Morning can be a convenient time to establish a breathing routine.
Before checking your phone or beginning your daily responsibilities, you might spend a few quiet minutes observing your breath.
Choose a time when you feel awake, comfortable, and unlikely to be interrupted.
Practising in the Evening
If your day is filled with work, travel, or family responsibilities, an evening session may be more practical.
Gentle breathing awareness can provide an opportunity to pause before moving into your evening activities.
If you practise before bed, choose comfortable techniques and avoid forceful breathing or prolonged breath retention, especially if you are inexperienced.
Should You Practise Before or After Meals?
Many traditional yoga guidelines recommend practising pranayama on an empty or relatively light stomach.
Practising immediately after a heavy meal may feel uncomfortable, particularly when a technique involves noticeable abdominal movement.
If you have eaten a substantial meal, allow time for digestion before beginning your session.
Can You Practise Pranayama Every Day?
Gentle breathing awareness can often be incorporated into a daily routine.
Start with a few minutes and increase the duration gradually, provided the practice remains comfortable.
There is no need to push through discomfort or feel guilty if you miss a day. Develop a routine that fits your life and allows you to practise consistently.
Important Safety Guidelines for Pranayama Beginners
Pranayama should be approached with patience and an understanding of your individual limits.
Gentle breathing awareness is accessible to many people, but not every traditional breathing technique is suitable for every person. Some practices involve rapid breathing, forceful exhalations, or prolonged breath retention and require additional instruction.
Keep the following precautions in mind.
1. Never Force Your Breathing
Your breath should remain smooth and comfortable.
Avoid taking the deepest possible inhalation or extending your exhalation beyond what feels natural.
If you find yourself straining, relax and return to normal breathing.
2. Avoid Prolonged Breath-Holding as a Beginner
Some traditional pranayama practices include kumbhaka, which refers to breath retention.
Although breath retention has a place in certain yoga traditions, prolonged or forced breath-holding is not necessary for the beginner exercises described in this guide.
Learn basic techniques first. If you wish to explore advanced practices, seek guidance from a qualified yoga teacher.
3. Choose a Safe, Comfortable Environment
Practise in a quiet, well-ventilated place where you can sit comfortably.
Avoid performing breathing exercises while driving, swimming, operating machinery, or doing anything where dizziness or distraction could put you at risk.
4. Stop if You Feel Dizzy or Uncomfortable
Dizziness, tingling, unusual breathlessness, or discomfort can occur when breathing becomes too forceful or a technique does not suit you.
If this happens, stop immediately and return to normal breathing. Rest in a safe position until you feel comfortable again.
Do not continue simply to finish a set number of rounds.
Seek medical attention if symptoms are severe or persistent, or if they occur with chest pain, fainting, or significant difficulty breathing.
5. Consider Your Existing Health Conditions
If you have asthma, a heart condition, uncontrolled high blood pressure, a history of fainting, or another significant medical condition, consult your healthcare professional before beginning a new pranayama routine.
Pregnant individuals and people recovering from surgery should also seek appropriate guidance, particularly before attempting forceful breathing, strong abdominal movements, or breath retention.
6. Learn Advanced Techniques with Proper Guidance
You may come across other traditional practices, including Kapalabhati and Bhastrika, when exploring pranayama.
These techniques can involve more forceful or rapid breathing and are not necessary for beginners.
A qualified yoga teacher can explain the methods, identify common mistakes, and help you understand whether a particular practice is appropriate for your circumstances.
Common Pranayama Mistakes Beginners Should Avoid
Learning how to practise safely is just as important as understanding the techniques themselves.
Here are some common mistakes to watch out for.
Breathing too deeply: Taking a bigger breath does not automatically make the exercise better. Keep each inhalation and exhalation comfortable.
Holding your breath for too long: The beginner practices in this article do not require breath retention. There is no need to introduce it.
Trying too many techniques at once: Begin with one or two exercises rather than attempting to master everything immediately.
Ignoring discomfort: Dizziness, pain, and unusual breathlessness are reasons to stop. They are not signs that you need to push harder.
Expecting instant results: Some people feel more relaxed after a short session, while others need time to become familiar with the practice. Individual experiences differ.
Concentrating too much on perfect technique: A comfortable posture and relaxed breathing are more important than achieving an exact count or producing a particular sound.
Practising advanced techniques without guidance: Online articles can introduce basic concepts, but a qualified teacher can provide personalised feedback and help you understand traditional methods more fully.
Most importantly, avoid comparing your progress with someone else’s.
Pranayama is a personal practice. You can take your time, learn gradually, and choose the techniques that feel appropriate for you.
Frequently Asked Questions About Pranayama for Beginners
1. Which pranayama is best for beginners?
Dirgha Pranayama, Sama Vritti, and gentle Bhramari are useful starting points because they focus on comfortable breathing and awareness.
Anulom Vilom can also be suitable when practised gently without breath retention. The best choice depends on your comfort and individual health needs.
2. How long should beginners practise pranayama?
You can begin with three to five minutes a day and gradually increase the duration if you remain comfortable.
There is no universal duration that suits everyone. A short, regular practice is a sensible starting point.
3. Can pranayama help reduce stress?
Gentle, controlled breathing may help some people feel calmer and manage everyday stress.
However, its effects vary. If stress or anxiety significantly affects your daily life, breathing exercises should complement rather than replace appropriate professional care.
4. Can I practise pranayama before sleeping?
Yes, many people incorporate gentle breathing exercises into their evening routine.
You can try natural breathing awareness or comfortable equal breathing for a few minutes. Avoid forceful techniques and prolonged breath retention, particularly if you are new to pranayama.
5. Is pranayama suitable for older adults?
Many older adults can explore gentle breathing awareness while seated comfortably.
However, existing health conditions, balance concerns, and respiratory or cardiovascular problems may require adjustments. Seek advice from a healthcare professional or qualified yoga teacher when appropriate.
6. Can I practise pranayama without doing yoga asanas?
Yes. Basic breathing exercises can be practised independently of physical yoga postures.
You can sit comfortably on a chair or mat while practising breathing awareness. If you wish to progress to more advanced traditional techniques, learning within a structured yoga programme may be helpful.
7. Should I breathe through my nose or mouth during pranayama?
For most of the beginner techniques discussed here, breathing through the nose is customary.
Bhramari involves inhaling through the nose and producing a gentle humming sound during exhalation.
If nasal congestion or a medical condition makes nasal breathing difficult, do not force it. Choose a comfortable approach and seek professional guidance when necessary.
8. What should I do if I feel dizzy during pranayama?
Stop immediately and return to normal breathing. Sit or lie down somewhere safe until you feel better.
Do not resume the exercise just to complete the planned number of rounds. If dizziness persists, recurs, or occurs with other concerning symptoms, seek medical advice.
9. Can children learn pranayama?
Children can explore simple, age-appropriate breathing awareness with suitable adult supervision.
Keep the exercises gentle and brief. Avoid forceful breathing and breath retention, and consult a qualified instructor or healthcare professional if the child has a relevant medical condition.
10. Do I need a yoga teacher to learn pranayama?
You can begin with basic breathing awareness using simple instructions.
However, learning from a qualified yoga teacher can help you develop good habits, understand traditional techniques, and recognise mistakes. Personal guidance is particularly valuable when exploring advanced practices or when you have specific health concerns.
Bringing Pranayama into Your Everyday Life
Pranayama does not need to become another demanding task on your daily checklist.
It can begin with something as simple as sitting quietly for a few minutes in the morning and noticing the movement of your breath.
You might start with three-part breathing, explore the steady rhythm of Sama Vritti, or discover the gentle sound of Bhramari. As your familiarity grows, you can learn more about other techniques and their place in traditional yoga.
There is no need to rush through the process.
Give yourself time to become comfortable with each exercise. Respect your physical limits, avoid forcing your breath, and seek qualified guidance whenever necessary.
In the traditional understanding of yoga, pranayama is more than a breathing exercise. It is an opportunity to develop awareness, discipline, and a closer connection with the present moment.
Start gently, practise consistently, and allow your experience to develop naturally.
If you would like to explore more about India’s traditional arts, cultural heritage, and practices that connect generations, visit Sampradaya Kala Kendra.
Discover how India’s rich traditions continue to inspire learning, creativity, and a deeper appreciation of our cultural roots.
